So this past Saturday, I stopped by at my go-to Nissan dealer, or more precisely, the Nissan Prince Motorsports Division (which is basically a sub group of select Nissan dealer technical advisors and extremely experienced ex-race mechanics who really know all about Nissan's sports cars. Oh and they are R32 and R33 GT-R owners too!). Since purchasing my car back in 2006 until I moved out of Tokyo, I had all of my servicing (except for the MINE'S engine, of course) done by them. So they know me and my car, but more importantly I trust them!
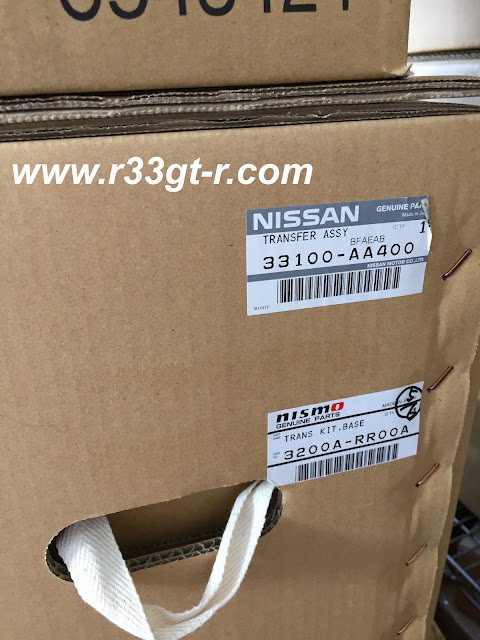
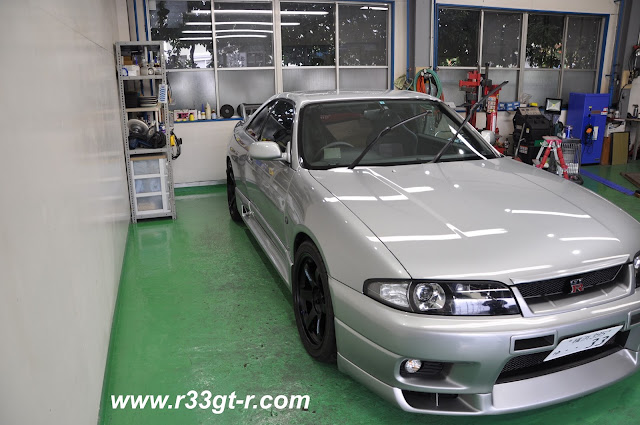
NPMD used to be located at Nissan Shinagawa but is now at Nissan Kamedo, which means an extra 15 minutes of driving for me. But it's always nice to drop in for a nerd RB-centric chat, although this was only the second time I dropped in since they had moved to Kamedo 3 years ago! This time, I was picking up some parts for a future project I had ordered on my first visit a few weeks ago, and it was a busy day so they let me park in one of the work bays.
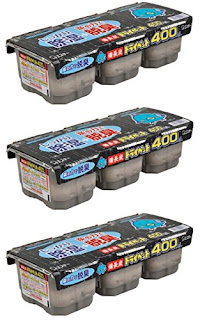
Since I had some time to kill, I decided to see if my friend Thomas Mangum was correct about NISMO's Competition Oil.
![]()
There are three grades of engine oil in the Competition series (5W40 for theVR38DETT engine, 15W50 for tuned RB26DETTs, and 0W30 for the VQ35DE/VQ35SHR), and one grade of gearbox oil (75W140). Here is the link to the line-up website. All were developed in conjunction with MOTUL, who as fans of NISMO Racing know, have had a relationship with Nissan since 2003. Interestingly, NISMO also has a separate, Motul based 10W60 grade oil (found in their catalog only, no dedicated website like the Competition series), designed especially for the RB26DETT engine, but for street use/ non-tuned engines. Apparently all of these replace their long running "Veruspeed" oil series.
Anyway, a few weeks ago I had gone to Zama to pick up a few things from Thomas. Naturally, we took some photos:
![]()
![]()
Oh and check this out, I found an old photo from 4 years ago!
Anyway, when I met up with him, Thomas, who is a stickler for this kind of stuff, threw me a half used bottle of Motul 300V Competition 15W50 and sniffed, "You can have that, I only use NISMO oil now." I had to laugh, it's the same thing, just with the NISMO name on the bottle (and thus 150% more expensive), right? I mean NISMO doesn't make their own stuff, they just rebrand tuning parts made especially for them by famous specialists (e.g., it is widely accepted as truth that ARC makes the NISMO intercoolers) and charge a premium for the name.
But Thomas swore to me that his car's engine "felt better" and that it felt "slicker, more responsive" than before when he used Motul 300V Competition 15W-50. When I asked him to clarify - does that mean the engine feels better lubricated, he replied, "I don't know if the words 'more lubricated' is right - it felt as though the engine just came on boost faster, and much smoother."
So when I was at NPMD on Saturday, I asked: is there actually a difference? A measurable difference between the NISMO Competition oil and the MOTUL 300V?
First, it turns out that NISMO already has a 10W60 grade oil especially for the RB26DETT, as I mentioned earlier. However, the NISMO Competition 15W50 is designed for some tuned RB26DETT engines - this oil is what NISMO recommends for their S1/R1 crate engines, much like the Competition 5W40 oil is THE oil (GT-R logo included) Nissan designates for the R35 GT-R (as well as the NISMO S2/R2 engines). But all the tech could really tell me was, "it has different, better stuff in it." Fair enough, he's not a chemist, so let's see what NISMO themselves say in their online catalog.
The English translation is pretty good but not completely accurate. I think it should read like this (go ahead and compare with what NISMO has in the catalog):
Concept Behind the Base Oil:
This is an ester based oil with polymer esters mixed in. We used know-how from Motul's Double Ester Technology in order to compensate for poor low temperature viscosity performance, a weakness of complex ester oils.
Allowable Torque: Set to Approx 70kgf-m (around 600ps).
-This is a high performance engine oil, developed during tuning car races and drifting events for turbo charged engines such as the RB26DETT and SR20DET.
- This has high shear stability in order to prevent the oil film from breaking at high torque at low speeds. Even with the extreme increase in torque found in NOS injection a high degree of reliability has been proven by way of sufficient durability.
- To provide for reliability without sacrificing the engine output as much as possible, a special multifunction polymer was used which increases both shear stability and detergent dispersion. With this, not only is there oil film protection but this also improves the lubrication of the turbo bearings which tend to coke up at high temperatures.
So the catalog's English is a bit more optimistic sounding, I think. But what is really interesting is in the small print, as usual, not just for this grade but the others as well. For example, Nissan Motor Company does NOT guarantee any of the Competition series oil, because it's designed for track use (it also does not guarantee the non Competition 10W60, but gives no reason - probably because they don't make it?). Also, for track use, one should use the 5W40 or 15W50 blend if one has a NISMO crate engine. The 5W40 blend, which is the "official" oil for the R35 (including the GT-R RC and NISMO GT3 variants) and cars with the Nismo S2/R2 engines, should be changed at 3000kms if there is track use or 10,000km if street use. With the 10W60 (non-Competition), the recommended change is at 6000kms for general all purpose use. For 15W50 and 0W30, the recommended change is at 3000kms. For all of the oil, Nissan warns that it will not exchange any dented or slightly damaged cans, as this product is imported.
Given the small print here is what I think we can figure out.
1) Made by Motul, in France.
2) The descriptions for the 5W40 and 0W30 blends state the reduced use of detergent dispersants. I am guessing that this is true of the 15W50, even if it doesn't say so. This explains the recommendation to change at a very low 3000kms, regardless of use (even though the presumption is track use, I did not see that written anywhere for this mileage recommendation). Note the 10W60 which is for general use, mandates a 6000kms oil change frequency.
3) The data doesn't lie - the coefficients of kinematic viscosity (in mm^2/s) are listed as follows for all 4 NISMO engine oils:
a) 5W40 - at 40C is 85.2, and at 100C is 14.2 (with a viscosity index of 172)
b) 15W50 - at 40C is 125.9, and at 100C is 17.7 (with a viscosity index of 156)
c) 0W30 - at 40C is 50.9, and at 100C is 9.6 (with a viscosity index of 176)
d) 10W60- at 40C is 153.1, and at 100C is 24.1 (with a viscosity index of 190)
Comparing to what I found from Motul for their 300V Competition 15W50:
Viscosity (in mm^2/s) at 40C is 128.1, and at 100C is 17.8 (with a viscosity index of 154). The density at 20C is 0.88 (same as the NISMO) and the pour point is -36C (again same as the NISMO).
Conclusion: assuming the same measuring standards were used, by the numbers, a NEGLIGIBLE difference. Any difference would have to come from the additives (or lack thereof), as NISMO itself claims.
4) For the R35, the mileage recommendations makes sense. The VR38DETT is built to a much higher level of tolerances and smaller clearances than the old RB26DETT. So track use is probably more of a heat issue than a friction issue, as it would be both in an RB26. Thus if there is not much heat (i.e. street use only) they can get away with less detergent being used in the oil, and thus go a longer distance.
When I checked on the Japanese car blog site Minkara, I found people who had used the oil and posted their impressions. One person said his engine is very quiet now, but the stuff turns black by 1000kms (again this might be consistent with the reduced level of detergents?). Another said that, it could be half placebo effect, but his engine starts easier, runs better and there is less drag.
I knew none of the above technical stuff when I was at NPMD, however mainly on the fact that I knew my car was due for an oil/filter change, I went ahead and had my oil changed with the NISMO Competition 15W50 (the oil viscosity grade that MINE'S recommends for their built engines):
My impressions?
To be honest, when I first cranked the engine after the oil change, the engine DID seem to be a bit quieter, and it felt SLIGHTLY more responsive. Now that I've studied the numbers, I would, however, be the first to admit that this is likely a placebo effect, and probably more likely due to FRESH oil being put in! However, any little bit helps and so even if there is a small but unnoticeable benefit I'm happy. And the NISMO explanation, sure, I'll believe it (for now lol).
Finally, there is a more practical reason to be happy with the switch - when I looked online, I found that NISMO Competition oil to be priced (at discount) about 20% LESS than the Motul I was using before in the past (for oil changes I do myself, of course). And since I don't drive my car that much, 3000km intervals isn't too often...
 |
| When Nissan Prince Motorsports Division was located at Nissan Shinagawa - note my Shinagawa number plate vs my current personalized Yokohama plate! |
 |
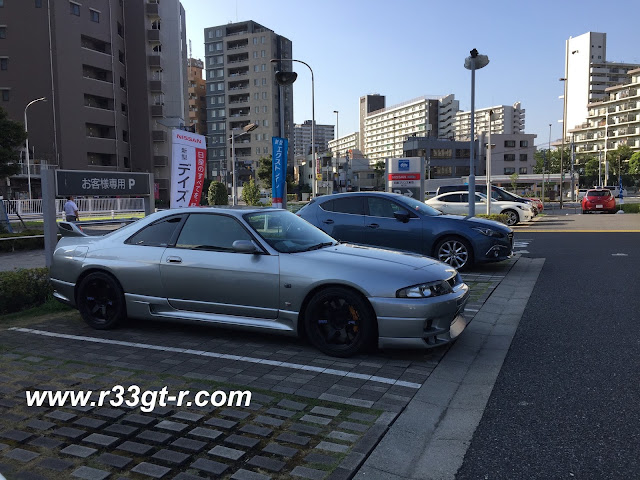
| In addition to these 3, there was a dark grey R33 GTR outside when I pulled in. FOUR R33s together is rare, even here in Japan! |
 |
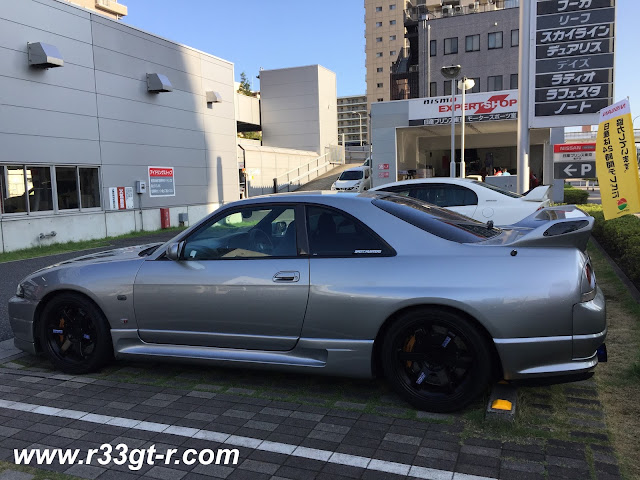
| Well hello younger (normal tune) brother...nice wheels you got there. |

There are three grades of engine oil in the Competition series (5W40 for theVR38DETT engine, 15W50 for tuned RB26DETTs, and 0W30 for the VQ35DE/VQ35SHR), and one grade of gearbox oil (75W140). Here is the link to the line-up website. All were developed in conjunction with MOTUL, who as fans of NISMO Racing know, have had a relationship with Nissan since 2003. Interestingly, NISMO also has a separate, Motul based 10W60 grade oil (found in their catalog only, no dedicated website like the Competition series), designed especially for the RB26DETT engine, but for street use/ non-tuned engines. Apparently all of these replace their long running "Veruspeed" oil series.
Anyway, a few weeks ago I had gone to Zama to pick up a few things from Thomas. Naturally, we took some photos:


Oh and check this out, I found an old photo from 4 years ago!
 |
| From: http://www.r33gt-r.com/2011/06/new-feature-guest-blog-r33-gtr-owner.html |
In 4 years, our cars sure have changed... but that's a topic for another post!
Anyway, when I met up with him, Thomas, who is a stickler for this kind of stuff, threw me a half used bottle of Motul 300V Competition 15W50 and sniffed, "You can have that, I only use NISMO oil now." I had to laugh, it's the same thing, just with the NISMO name on the bottle (and thus 150% more expensive), right? I mean NISMO doesn't make their own stuff, they just rebrand tuning parts made especially for them by famous specialists (e.g., it is widely accepted as truth that ARC makes the NISMO intercoolers) and charge a premium for the name.
But Thomas swore to me that his car's engine "felt better" and that it felt "slicker, more responsive" than before when he used Motul 300V Competition 15W-50. When I asked him to clarify - does that mean the engine feels better lubricated, he replied, "I don't know if the words 'more lubricated' is right - it felt as though the engine just came on boost faster, and much smoother."
So when I was at NPMD on Saturday, I asked: is there actually a difference? A measurable difference between the NISMO Competition oil and the MOTUL 300V?
 |
| Courtesy of: http://minkara.carview.co.jp/en/userid/338959/car/239984/2458609/parts.aspx |
The English translation is pretty good but not completely accurate. I think it should read like this (go ahead and compare with what NISMO has in the catalog):
Concept Behind the Base Oil:
This is an ester based oil with polymer esters mixed in. We used know-how from Motul's Double Ester Technology in order to compensate for poor low temperature viscosity performance, a weakness of complex ester oils.
Allowable Torque: Set to Approx 70kgf-m (around 600ps).
-This is a high performance engine oil, developed during tuning car races and drifting events for turbo charged engines such as the RB26DETT and SR20DET.
- This has high shear stability in order to prevent the oil film from breaking at high torque at low speeds. Even with the extreme increase in torque found in NOS injection a high degree of reliability has been proven by way of sufficient durability.
- To provide for reliability without sacrificing the engine output as much as possible, a special multifunction polymer was used which increases both shear stability and detergent dispersion. With this, not only is there oil film protection but this also improves the lubrication of the turbo bearings which tend to coke up at high temperatures.
So the catalog's English is a bit more optimistic sounding, I think. But what is really interesting is in the small print, as usual, not just for this grade but the others as well. For example, Nissan Motor Company does NOT guarantee any of the Competition series oil, because it's designed for track use (it also does not guarantee the non Competition 10W60, but gives no reason - probably because they don't make it?). Also, for track use, one should use the 5W40 or 15W50 blend if one has a NISMO crate engine. The 5W40 blend, which is the "official" oil for the R35 (including the GT-R RC and NISMO GT3 variants) and cars with the Nismo S2/R2 engines, should be changed at 3000kms if there is track use or 10,000km if street use. With the 10W60 (non-Competition), the recommended change is at 6000kms for general all purpose use. For 15W50 and 0W30, the recommended change is at 3000kms. For all of the oil, Nissan warns that it will not exchange any dented or slightly damaged cans, as this product is imported.
Given the small print here is what I think we can figure out.
1) Made by Motul, in France.
2) The descriptions for the 5W40 and 0W30 blends state the reduced use of detergent dispersants. I am guessing that this is true of the 15W50, even if it doesn't say so. This explains the recommendation to change at a very low 3000kms, regardless of use (even though the presumption is track use, I did not see that written anywhere for this mileage recommendation). Note the 10W60 which is for general use, mandates a 6000kms oil change frequency.
3) The data doesn't lie - the coefficients of kinematic viscosity (in mm^2/s) are listed as follows for all 4 NISMO engine oils:
a) 5W40 - at 40C is 85.2, and at 100C is 14.2 (with a viscosity index of 172)
b) 15W50 - at 40C is 125.9, and at 100C is 17.7 (with a viscosity index of 156)
c) 0W30 - at 40C is 50.9, and at 100C is 9.6 (with a viscosity index of 176)
d) 10W60- at 40C is 153.1, and at 100C is 24.1 (with a viscosity index of 190)
Comparing to what I found from Motul for their 300V Competition 15W50:
Viscosity (in mm^2/s) at 40C is 128.1, and at 100C is 17.8 (with a viscosity index of 154). The density at 20C is 0.88 (same as the NISMO) and the pour point is -36C (again same as the NISMO).
Conclusion: assuming the same measuring standards were used, by the numbers, a NEGLIGIBLE difference. Any difference would have to come from the additives (or lack thereof), as NISMO itself claims.
4) For the R35, the mileage recommendations makes sense. The VR38DETT is built to a much higher level of tolerances and smaller clearances than the old RB26DETT. So track use is probably more of a heat issue than a friction issue, as it would be both in an RB26. Thus if there is not much heat (i.e. street use only) they can get away with less detergent being used in the oil, and thus go a longer distance.
When I checked on the Japanese car blog site Minkara, I found people who had used the oil and posted their impressions. One person said his engine is very quiet now, but the stuff turns black by 1000kms (again this might be consistent with the reduced level of detergents?). Another said that, it could be half placebo effect, but his engine starts easier, runs better and there is less drag.
I knew none of the above technical stuff when I was at NPMD, however mainly on the fact that I knew my car was due for an oil/filter change, I went ahead and had my oil changed with the NISMO Competition 15W50 (the oil viscosity grade that MINE'S recommends for their built engines):
 |
| I guess oil changes are done with the mere mortals.... |
 |
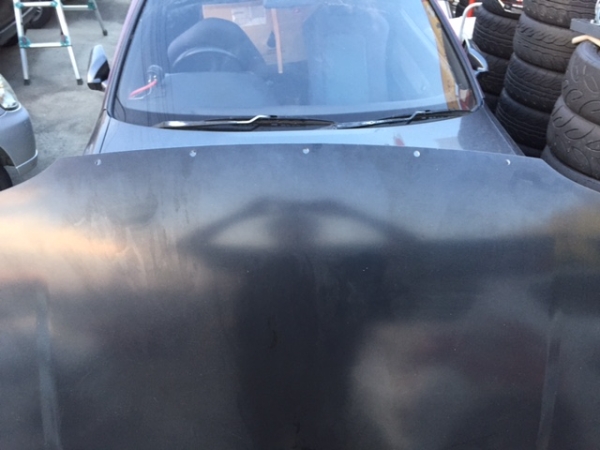
| Good company though - check out that grey BNR32... |
 |
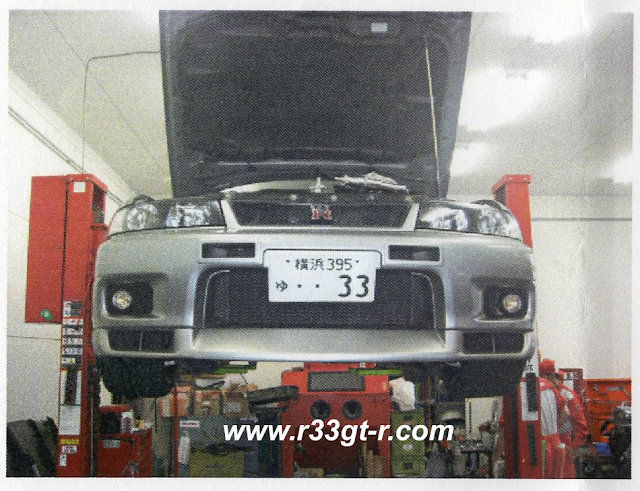
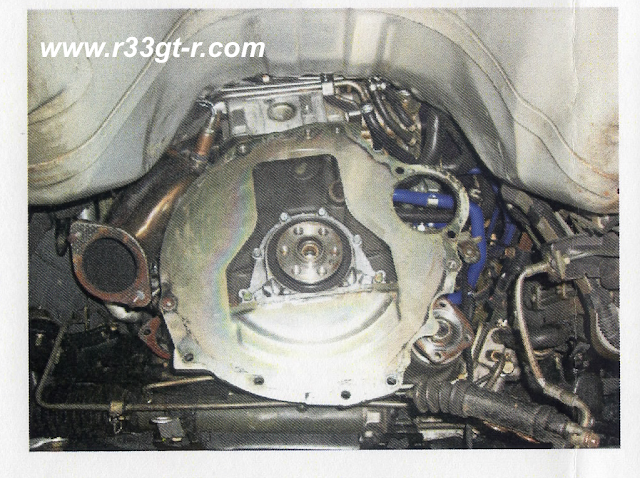
| Whew. One of the world's best GT-R mechanics, Yamada-san from NPMD, working on my car (here he is replacing the front under tray). Love how much my under chassis cleaning efforts from a few weeks before paid off!!! SO CLEAN! Lol |
To be honest, when I first cranked the engine after the oil change, the engine DID seem to be a bit quieter, and it felt SLIGHTLY more responsive. Now that I've studied the numbers, I would, however, be the first to admit that this is likely a placebo effect, and probably more likely due to FRESH oil being put in! However, any little bit helps and so even if there is a small but unnoticeable benefit I'm happy. And the NISMO explanation, sure, I'll believe it (for now lol).
 |
| Done, and ready to be driven home... Yamada-san (with the clipboard) ready to give me his report |